In the previous post, I wrote a tutorial on how to zoom the camera in a hack-ish way. Turns out the original author of Bullet Time Ninja article, Greg Lieberman, already fixed that with a haxeflixel-addon class, the FlxZoomCamera. If you look at the API page, you’ll notice that it doesn’t say much, so let’s explore that today.
Setup
I learned from a recent HaxeFlixel tweet that you can create a new HaxeFlixel “barebones” project template, which has minimal files/folders, and also excludes all the config and comments:
|
1 |
flixel tpl barebones -n "MyCameraTest4" |
Notice that the usual MenuState.hx file is now missing — the entry point is now PlayState.hx, which makes more sense. We’ll be using the barebones template for tutorials from now on. 🙂
Before we proceed, let’s change some configs — notice the difference of Main.hx (between barebones and non-barebones). The config variables and comments are now missing, and entry point (the last line) relies on the default values (Refer to the API):
|
1 |
addChild(new FlxGame(640, 480, PlayState)); |
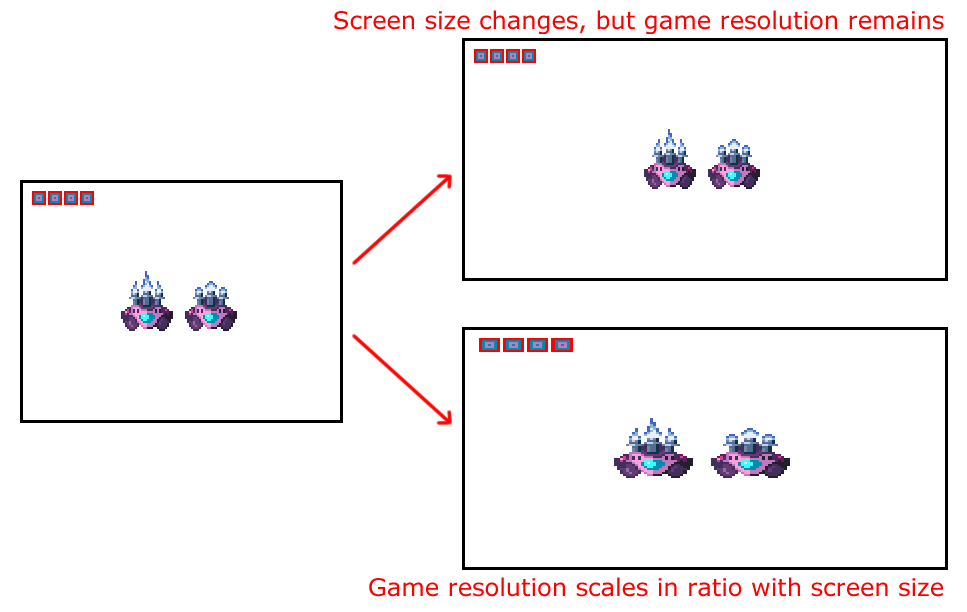
Anyway, to change the resolution of the screen, do it in Main.hx :
|
1 |
addChild(new FlxGame(320, 240, PlayState)); |
… and to change the size of the window screen, do it in Project.xml :
|
1 |
<window width="640" height="480" fps="60" background="#000000" hardware="true" vsync="true" /> |
To use the FlxZoomCamera class, which belongs to the flixel-addons haxelib, we need to enable it in the Project.xml, by uncommenting the line below:
|
1 |
<haxelib name="flixel-addons" /> |
And now we can start coding!
Code
Let’s set up the code similar to the previous tutorial:
|
1 2 3 4 5 6 7 8 9 10 11 12 13 14 15 16 17 18 19 20 21 22 23 24 25 26 27 28 29 30 31 32 33 34 35 36 37 38 39 40 41 42 43 44 45 46 47 48 49 50 51 52 53 54 55 56 57 58 59 60 61 62 63 64 65 66 67 68 69 70 71 72 73 74 75 76 77 78 79 |
package; import flixel.FlxG; import flixel.FlxSprite; import flixel.FlxState; import flixel.tile.FlxTilemap; import flixel.FlxCamera; class PlayState extends FlxState { var level:FlxTilemap; var player:FlxSprite; override public function create():Void { super.create(); // Set the camera background as white for visibility sake FlxG.camera.bgColor = 0xFFFFFFFF; // Create level var levelData:Array<Int> = [ 1,1,1,1,1,1,1,1,1,1,1,1,1,1,1,1,1,1,1,1,1,1,1,1,1,1,1,1,1,1,1,1,1,1,1,1,1,1,1,1, 1,0,0,0,0,0,0,0,0,0,0,0,0,0,0,0,0,0,0,1,1,0,0,0,0,0,0,0,0,0,0,0,0,0,0,0,0,0,0,1, 1,0,0,0,0,0,0,0,0,0,0,0,0,0,0,0,0,0,0,1,1,0,0,0,0,0,0,0,0,0,0,0,0,0,0,0,0,0,0,1, 1,0,0,0,0,0,0,0,0,0,0,0,0,0,0,1,1,1,1,1,1,0,0,0,0,0,0,0,0,0,0,0,0,0,0,1,1,1,1,1, 1,1,1,0,0,0,0,0,0,0,0,0,0,0,0,1,1,1,1,1,1,1,1,0,0,0,0,0,0,0,0,0,0,0,0,1,1,1,1,1, 1,1,1,0,0,0,0,0,0,1,1,0,0,0,0,0,0,0,0,1,1,1,1,0,0,0,0,0,0,1,1,0,0,0,0,0,0,0,0,1, 1,1,1,1,1,1,0,0,0,1,1,0,0,0,0,0,0,0,0,1,1,1,1,1,1,1,0,0,0,1,1,0,0,0,0,0,0,0,0,1, 1,1,1,1,1,1,0,0,0,0,0,0,0,0,0,0,0,0,0,1,1,1,1,1,1,1,0,0,0,0,0,0,0,0,0,0,0,0,0,1, 1,0,0,0,0,0,0,0,0,0,0,0,0,1,1,1,1,1,1,1,1,0,0,0,0,0,0,0,0,0,0,0,0,1,1,1,1,1,1,1, 1,0,0,0,0,0,0,0,0,0,0,0,0,1,1,1,1,1,1,1,1,0,0,0,0,0,0,0,0,0,0,0,0,1,1,1,1,1,1,1, 1,0,0,0,0,0,0,0,0,0,0,1,1,1,1,1,1,1,1,1,1,0,0,0,0,0,0,0,0,0,0,1,1,1,1,1,1,1,1,1, 1,0,0,0,0,0,0,0,0,0,0,1,1,1,1,1,1,1,1,1,1,0,0,0,0,0,0,0,0,0,0,1,1,1,1,1,1,1,1,1, 1,1,1,0,0,0,0,0,0,1,1,1,1,1,1,1,1,1,1,1,1,1,1,0,0,0,0,0,0,1,1,1,1,1,1,1,1,1,1,1, 1,1,1,0,0,0,0,0,0,1,1,1,1,1,1,1,1,1,1,1,1,1,1,0,0,0,0,0,0,1,1,1,1,1,1,1,1,1,1,1, 1,1,1,1,1,1,1,1,1,1,1,1,1,1,1,1,1,1,1,1,1,1,1,1,1,1,1,1,1,1,1,1,1,1,1,1,1,1,1,1, 1,1,1,1,1,1,1,1,1,1,1,1,1,1,1,1,1,1,1,1,1,1,1,1,1,1,1,1,1,1,1,1,1,1,1,1,1,1,1,1, 1,0,0,0,0,0,0,0,0,0,0,0,0,0,0,0,0,0,0,1,1,0,0,0,0,0,0,0,0,0,0,0,0,0,0,0,0,0,0,1, 1,0,0,0,0,0,0,0,0,0,0,0,0,0,0,0,0,0,0,1,1,0,0,0,0,0,0,0,0,0,0,0,0,0,0,0,0,0,0,1, 1,0,0,0,0,0,0,0,0,0,0,0,0,0,0,1,1,1,1,1,1,0,0,0,0,0,0,0,0,0,0,0,0,0,0,1,1,1,1,1, 1,1,1,0,0,0,0,0,0,0,0,0,0,0,0,1,1,1,1,1,1,1,1,0,0,0,0,0,0,0,0,0,0,0,0,1,1,1,1,1, 1,1,1,0,0,0,0,0,0,1,1,0,0,0,0,0,0,0,0,1,1,1,1,0,0,0,0,0,0,1,1,0,0,0,0,0,0,0,0,1, 1,1,1,1,1,1,0,0,0,1,1,0,0,0,0,0,0,0,0,1,1,1,1,1,1,1,0,0,0,1,1,0,0,0,0,0,0,0,0,1, 1,1,1,1,1,1,0,0,0,0,0,0,0,0,0,0,0,0,0,1,1,1,1,1,1,1,0,0,0,0,0,0,0,0,0,0,0,0,0,1, 1,0,0,0,0,0,0,0,0,0,0,0,0,1,1,1,1,1,1,1,1,0,0,0,0,0,0,0,0,0,0,0,0,1,1,1,1,1,1,1, 1,0,0,0,0,0,0,0,0,0,0,0,0,1,1,1,1,1,1,1,1,0,0,0,0,0,0,0,0,0,0,0,0,1,1,1,1,1,1,1, 1,0,0,0,0,0,0,0,0,0,0,1,1,1,1,1,1,1,1,1,1,0,0,0,0,0,0,0,0,0,0,1,1,1,1,1,1,1,1,1, 1,0,0,0,0,0,0,0,0,0,0,1,1,1,1,1,1,1,1,1,1,0,0,0,0,0,0,0,0,0,0,1,1,1,1,1,1,1,1,1, 1,1,1,0,0,0,0,0,0,1,1,1,1,1,1,1,1,1,1,1,1,1,1,0,0,0,0,0,0,1,1,1,1,1,1,1,1,1,1,1, 1,1,1,0,0,0,0,0,0,1,1,1,1,1,1,1,1,1,1,1,1,1,1,0,0,0,0,0,0,1,1,1,1,1,1,1,1,1,1,1, 1,1,1,1,1,1,1,1,1,1,1,1,1,1,1,1,1,1,1,1,1,1,1,1,1,1,1,1,1,1,1,1,1,1,1,1,1,1,1,1, ]; level = new FlxTilemap(); // There are 40 tiles for the map's width, hence the value "40" below level.loadMap(flixel.util.FlxStringUtil.arrayToCSV(levelData, 40), GraphicAuto, 8, 8, FlxTilemap.AUTO); add(level); // Create player player = new FlxSprite(20, 10); player.makeGraphic(5, 10, 0xFFFF0000); // create red square as player add(player); // This is the default camera, following the player FlxG.camera.follow(player, FlxCamera.STYLE_TOPDOWN, null, 5); } override public function update():Void { super.update(); // Move the player var moveSpeed:Int = 3; if (FlxG.keys.pressed.UP) player.y += -moveSpeed; if (FlxG.keys.pressed.DOWN) player.y += moveSpeed; if (FlxG.keys.pressed.LEFT) player.x += -moveSpeed; if (FlxG.keys.pressed.RIGHT) player.x += moveSpeed; } } |
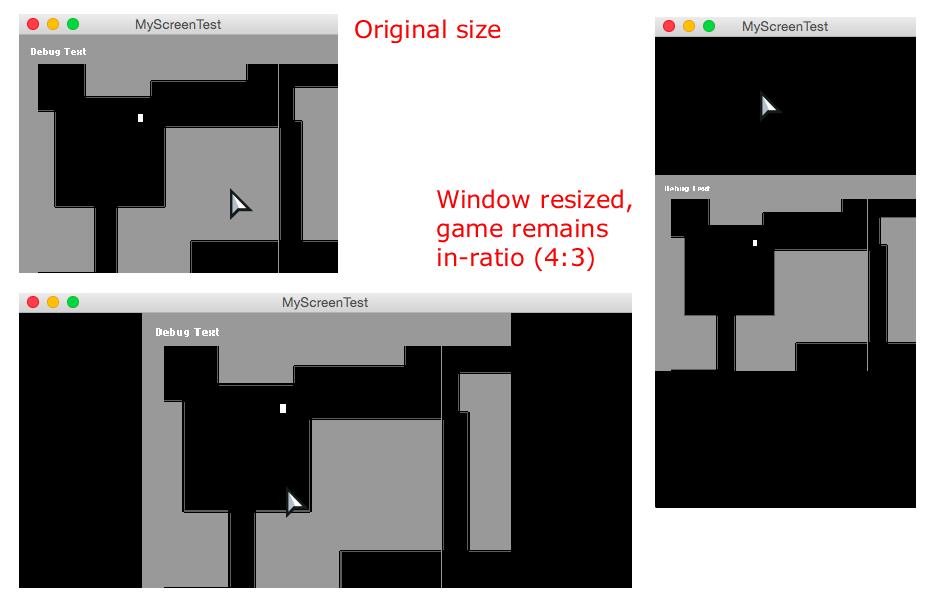
And when you run with lime test neko , you will get a player that moves in a placeholder map:

Now let’s use the FlxZoomCamera addon:
|
1 2 3 4 5 6 7 8 9 10 11 12 13 14 15 16 17 18 19 20 21 22 23 24 25 26 27 28 29 30 31 32 33 34 35 36 37 38 39 40 41 42 43 44 45 46 47 48 49 50 51 52 53 54 |
package; import flixel.FlxG; import flixel.FlxSprite; import flixel.FlxState; import flixel.tile.FlxTilemap; import flixel.FlxCamera; import flixel.addons.display.FlxZoomCamera; class PlayState extends FlxState { var level:FlxTilemap; var player:FlxSprite; var _zoomCam:FlxZoomCamera; override public function create():Void { super.create(); // Set the camera background as white for visibility sake ... // Create level ... // Create player ... // This is the default camera, following the player // FlxG.camera.follow(player, FlxCamera.STYLE_TOPDOWN, null, 5); // Create the FlxZoomCamera and pass in the default // camera's x/y/width/height/zoom values, then make // it follow the player var cam:FlxCamera = FlxG.camera; _zoomCam = new FlxZoomCamera(Std.int(cam.x), Std.int(cam.y), cam.width, cam.height, cam.zoom); _zoomCam.follow(player, FlxCamera.STYLE_TOPDOWN, null, 5); // Reset the camera list by replacing the default cam with _zoomCam FlxG.cameras.reset(_zoomCam); } override public function update():Void { super.update(); // Move the player ... // Zoom the camera if (FlxG.keys.justPressed.ONE) _zoomCam.targetZoom += -0.25; // zoom in if (FlxG.keys.justPressed.TWO) _zoomCam.targetZoom += 0.25; // zoom out } } |
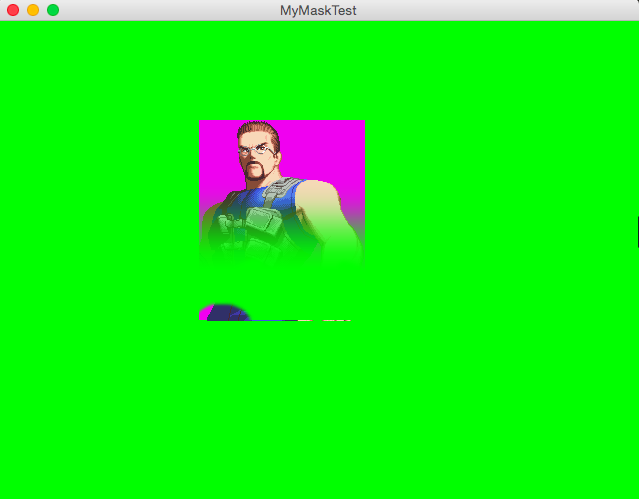
And when we test :

Hmm, when you zoom out, the camera behaves in a peculiar way — the camera moves along with the player’s movement.
If you refer to the FlxZoomCamera API, there doesn’t seem to be anything you can modify that can change the way the camera moves when you’re zoomed out.
However, if you look into the FlxZoomCamera.hx file (on OSX, it’s located at /usr/lib/haxe/lib/flixel-addons/1,1,0/flixel/addons/display), you’ll notice there are actually two private variables that seem better off as public:
|
1 2 3 4 5 6 7 8 9 10 |
/** * This number is pretty arbitrary, make sure it's greater than zero! */ private var _zoomSpeed:Float; /** * Determines how far to "look ahead" when the target is near the edge of the camera's bounds * 0 = no effect, 1 = huge effect */ private var _zoomMargin:Float; |
You can just make these public , and you can now play around with the value in your game, perhaps like this:
|
1 2 3 4 5 6 7 8 |
// Create the FlxZoomCamera and pass in the default // camera's x/y/width/height/zoom values, then make // it follow the player var cam:FlxCamera = FlxG.camera; _zoomCam = new FlxZoomCamera(Std.int(cam.x), Std.int(cam.y), cam.width, cam.height, cam.zoom); _zoomCam.follow(player, FlxCamera.STYLE_TOPDOWN, null, 5); _zoomCam._zoomMargin = 1.3; _zoomCam._zoomSpeed = 2; |
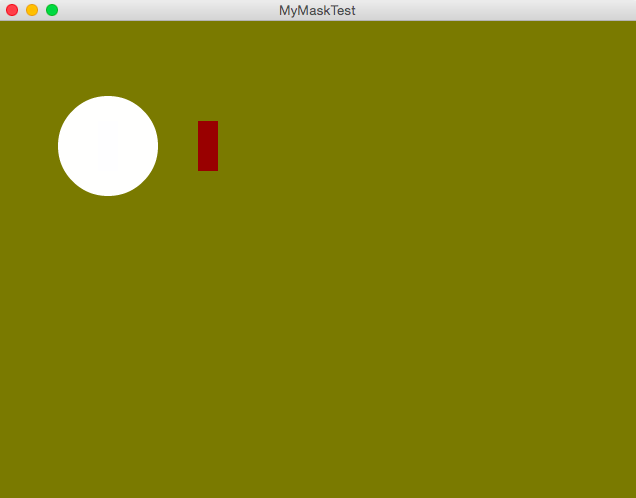
And the result:

Note the zoom speed has reduced greatly. Also, when zoomed out, the camera doesn’t seem to move around too much when the player moves.
_zoomSpeed sounds self-explanatory, but what exactly is _zoomMargin ? I don’t really know. I don’t understand what value it should be, but after some tinkering, it seems to be a range between -1.6 to 1.6. So if you want the camera to not move when zoomed out, just set _zoomMargin to a big value (e.g. 1.7) and it will probably work.
Otherwise, you may need to extend or rewrite the FlxZoomCamera.hx‘s alignCamera() function to suit your needs.
This concludes the revisited tutorial on zooming the camera.