Announcement: I’m entering crunch-time for a game project I’m working on. Hopefully it’ll finish by early August. I may not be able to update on the regular weekends, but I will try.
I’m a fan of image manipulation, but I can’t comprehend the math behind it all. In fact, before writing this tutorial, I spent about 4 hours researching and troubleshooting masking in HaxeFlixel.
We’re going to cover image masking today. I apologise in advance if the information below are inaccurate or inefficient. I’d appreciate any corrections or suggestions — just comment below this post and I’ll get back to you.
Introduction
There are two scenarios I could think of, when masking is necessary:
- Taking an image and masking it with another image
- Cutting a hole with a mask image (reverse masking)
As such, we shall proceed with the tutorial with the above two methods as our goal.
Setup
Let’s setup our HaxeFlixel project, as usual:
|
1 |
flixel tpl -n "MyMaskTest" |
As for placeholder assets, we shall be using the images included in the Flixel Power Tool Test Suite Github page (Note: cloning didn’t work for me, so I had to download the ZIP file instead).
Masking with two images
PhotonStorm’s Power Flixel Tools allows image masking, as demonstrated in the demo page (specifically, the FlxDisplay page). Thankfully, it was ported to HaxeFlixel under the flixel.util.FlxSpriteUtil library.
Let’s start off with loading the two images in MenuState.hx:
|
1 2 3 4 5 6 7 8 9 10 11 12 13 14 15 16 17 18 19 20 21 22 23 24 25 26 27 28 29 30 31 32 33 34 35 36 |
package; import flixel.FlxState; import flixel.FlxG; import flixel.FlxSprite; class MenuState extends FlxState { override public function create():Void { super.create(); // Set the background color for visibility sake FlxG.camera.bgColor = 0xFF00FF00; // Create two separate images with PNG transparency var base = new FlxSprite(0,0); var mask = new FlxSprite(0,0); base.loadGraphic("assets/images/shocktroopers_leon.png"); mask.loadGraphic("assets/images/mask-test.png"); // Add them to stage add(base); add(mask); } override public function update():Void { super.update(); } override public function destroy():Void { super.destroy(); } } |
And if you build with lime test neko , you’ll get this:
The output is straight-forward — there’s no masking yet. To mask the two images, you need to merge them into a result FlxSprite, and add that to the stage, like this:
|
1 2 3 4 5 6 7 8 9 10 11 12 13 14 15 16 17 18 19 20 21 22 23 24 25 26 27 28 29 30 31 |
package; import flixel.FlxState; import flixel.FlxG; import flixel.FlxSprite; import flixel.util.FlxSpriteUtil; class MenuState extends FlxState { override public function create():Void { super.create(); // Set the background color for visibility sake ... // Create two separate images with PNG transparency ... // Add them to stage // add(base); // add(mask); // Apply the mask to the base image, and add the result to stage var result = new FlxSprite(200,100); FlxSpriteUtil.alphaMaskFlxSprite(base, mask, result); add(result); } ... } |
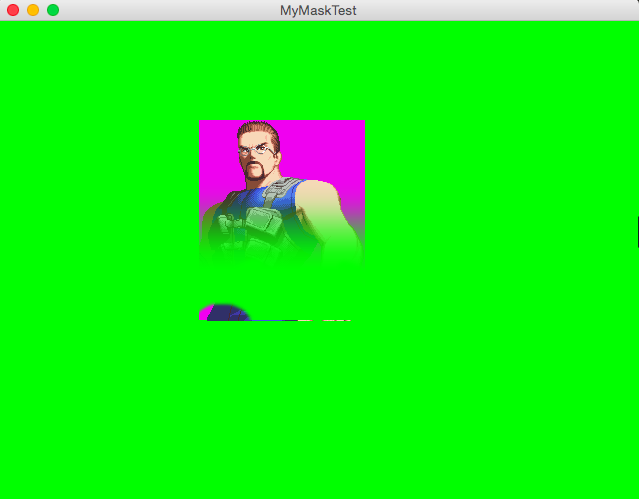
The above code produces this result:
Note two issues with the output:
- The x/y position of the base and mask FlxSprites doesn’t seem to affect the result FlxSprite. It merges at the origin top-left point (0,0) by default.
- The base image’s transparency isn’t preserved after merging (note the pink background for the character)
As of writing, I couldn’t figure out how to easily fix the above issues. If you need a solution for the issues mentioned, my only suggestion for now is to use your favorite image editor (e.g. Photoshop) and create your desired masked/transparent PNG instead.
Reverse masking
This example seems to be most common. Let’s rewrite the existing code in MenuState.hx:
|
1 2 3 4 5 6 7 8 9 10 11 12 13 14 15 16 17 18 19 20 21 22 23 24 25 26 27 28 29 30 31 32 33 34 35 36 37 38 39 40 41 42 43 44 45 46 47 48 49 50 51 52 53 54 55 56 |
package; import flixel.FlxState; import flixel.FlxG; import flixel.FlxSprite; import flixel.util.FlxSpriteUtil; class MenuState extends FlxState { var _player:FlxSprite; var _dummy:FlxSprite; var _curtain:FlxSprite; var _mask:FlxSprite; override public function create():Void { super.create(); // Create the sprites var bg = new FlxSprite(0, 0); _dummy = new FlxSprite(200, 100); _player = new FlxSprite(100, 100); _curtain = new FlxSprite(); // Create the sprites' graphics var screenW = FlxG.stage.stageWidth; var screenH = FlxG.stage.stageHeight; bg.makeGraphic(screenW, screenH, 0xFFcccc00); _dummy.makeGraphic(20, 50, 0xFFFF0000); _player.makeGraphic(20, 50, 0xFF0000FF); _curtain.makeGraphic(screenW, screenH, 0x66000000); // Add them to stage add(bg); add(_dummy); add(_player); add(_curtain); } override public function update():Void { super.update(); // Allow player movement var mSpeed = 3; if (FlxG.keys.pressed.LEFT) _player.x -= mSpeed; if (FlxG.keys.pressed.RIGHT) _player.x += mSpeed; if (FlxG.keys.pressed.UP) _player.y -= mSpeed; if (FlxG.keys.pressed.DOWN) _player.y += mSpeed; } override public function destroy():Void { super.destroy(); } } |
And the result is as follows:
Note the curtain is a semi-transparent black rectangle that covers the whole screen. Let’s say we want to cut a hole where the player and dummy is, perhaps we’d do it like this:
|
1 2 3 4 5 6 7 8 9 10 11 12 13 14 15 16 17 18 19 20 21 22 23 24 25 26 27 28 29 30 31 32 33 34 35 36 |
package; import flixel.FlxState; import flixel.FlxG; import flixel.FlxSprite; import flixel.util.FlxSpriteUtil; import flixel.util.FlxColor; class MenuState extends FlxState { ... override public function create():Void { super.create(); // Create the sprites ... // Create the sprites' graphics ... // Add them to stage add(bg); add(_dummy); add(_player); // add(_curtain); // Slice a circle into the curtain FlxSpriteUtil.drawCircle(_mask, _player.getMidpoint().x, _player.getMidpoint().y, 50, FlxColor.WHITE); FlxSpriteUtil.alphaMaskFlxSprite(_curtain, _mask, _curtain); add(_curtain); } ... } |
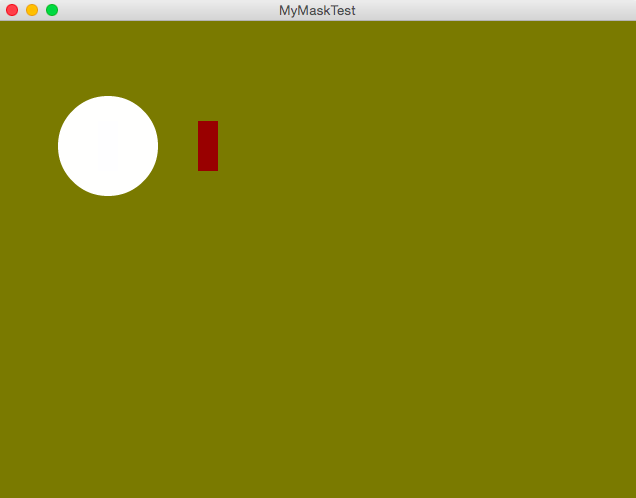
But the result doesn’t seem to be as expected:
There are three problems with the above output:
- The circle mask has the same issue as mentioned in “Masking with two images” section above — the base image (the curtain) lost its transparency, which results in a solid white circle.
- The circle is supposed to be transparent, not opaque.
- The circle mask does not follow the player’s movement.
Luckily, I managed to find a solution for the above mentioned. First, let’s fix the circle mask:
|
1 2 3 4 5 6 7 8 9 10 11 12 13 14 15 16 17 18 19 20 21 22 23 24 25 26 27 28 29 30 31 32 33 34 35 36 37 38 39 40 41 42 43 44 45 46 47 48 49 50 51 52 53 54 55 56 57 58 59 60 |
package; import flixel.FlxState; import flixel.FlxG; import flixel.FlxSprite; import flixel.util.FlxSpriteUtil; import flixel.util.FlxColor; import flash.geom.Rectangle; import flash.geom.ColorTransform; import flash.geom.Point; import flash.display.BitmapData; import flash.display.BitmapDataChannel; class MenuState extends FlxState { ... override public function create():Void { super.create(); // Create the sprites ... // Create the sprites' graphics ... // Add them to stage ... // Slice a circle into the curtain FlxSpriteUtil.drawCircle(_mask, _player.getMidpoint().x, _player.getMidpoint().y, 50, FlxColor.WHITE); invertedAlphaMaskFlxSprite(_curtain, _mask, _curtain); add(_curtain); } function invertedAlphaMaskFlxSprite(sprite:FlxSprite, mask:FlxSprite, output:FlxSprite):FlxSprite { // Solution based on the discussion here: // https://groups.google.com/forum/#!topic/haxeflixel/fq7_Y6X2ngY // NOTE: The code below is the same as FlxSpriteUtil.alphaMaskFlxSprite(), // except it has an EXTRA section below. sprite.drawFrame(); var data:BitmapData = sprite.pixels.clone(); data.copyChannel(mask.pixels, new Rectangle(0, 0, sprite.width, sprite.height), new Point(), BitmapDataChannel.ALPHA, BitmapDataChannel.ALPHA); // EXTRA: // this code applies a -1 multiplier to the alpha channel, // turning the opaque circle into a transparent circle. data.colorTransform(new Rectangle(0, 0, sprite.width, sprite.height), new ColorTransform(0,0,0,-1,0,0,0,255)); // end EXTRA output.pixels = data; return output; } ... } |
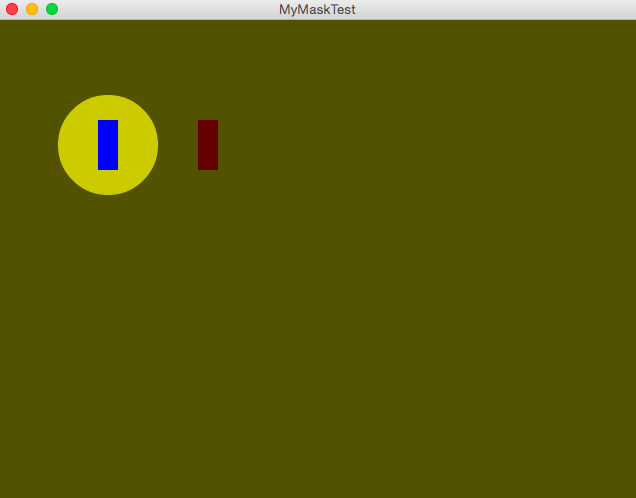
Note the invertedAlphaMaskFlxSprite function, which is a little hack based on the existing FlxSpriteUtil.alphaMaskFlxSprite function, as explained from the forum page here. The result is as follows:
Now let’s make the circle follow the player:
|
1 2 3 4 5 6 7 8 9 10 11 12 13 14 15 16 17 18 19 20 21 22 23 24 25 26 27 28 29 30 31 32 33 34 35 36 37 38 39 40 41 42 43 44 45 46 47 48 49 50 51 52 53 54 55 56 57 |
package; ... class MenuState extends FlxState { ... override public function create():Void { super.create(); // Create the sprites ... // Create the sprites' graphics ... // Add them to stage add(bg); add(_dummy); add(_player); add(_curtain); } function invertedAlphaMaskFlxSprite(sprite:FlxSprite, mask:FlxSprite, output:FlxSprite):FlxSprite { ... } override public function update():Void { super.update(); // Allow player movement ... // The "cutting" of the circle over the mask needs // to be redrawn, because the base image (curtain) is // in a fixed position. UpdateMask(); } function UpdateMask():Void { // In each update, create a new mask based on the original // _curtain's uncut rectangle, then cut a circle into it. var newMask = new FlxSprite(); newMask.loadGraphicFromSprite(_curtain); FlxSpriteUtil.drawCircle(newMask, _player.getMidpoint().x, _player.getMidpoint().y, 50, FlxColor.WHITE); // Draw onto the _mask invertedAlphaMaskFlxSprite(_curtain, newMask, _mask); } ... } |
But the result is undesired (or perhaps desired, depending on your intention):
What exactly is happening? After I did some tinkering, here’s the explanation I could come up with:
- All FlxSprite images are cached, whether it’s created with makeGraphic or loaded with loadGraphic .
- When an image is cached, doing a makeGraphic (using the same shape and color) or loadGraphic (using the same image path) will result in the cached image being used, instead of a new image.
- In the above code, we tried to create a newMask FlxSprite, then load the _curtain ‘s image data into it. We assumed the _curtain ‘s image is uncut, which is true. However, the _mask ‘s bitmap data has been cached, so the cached image is used, resulting in the _mask being continuously re-cut and updated instead.
The first solution I would think of, was to do a clone of the bitmapData instead, which means we don’t use the cached image:
|
1 2 3 4 5 6 7 8 9 10 11 12 |
function UpdateMask():Void { // In each update, create a new mask based on the original // _curtain's uncut rectangle, then cut a circle into it. var newMask = new FlxSprite(); // newMask.loadGraphicFromSprite(_curtain); newMask.pixels = _curtain.pixels.clone(); FlxSpriteUtil.drawCircle(newMask, _player.getMidpoint().x, _player.getMidpoint().y, 50, FlxColor.WHITE); // Draw onto the _mask invertedAlphaMaskFlxSprite(_curtain, newMask, _mask); } |
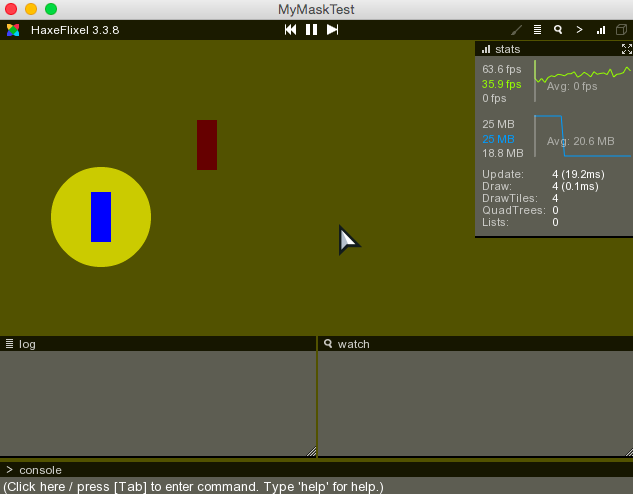
Now, if you test the game, it works as expected; The circle mask now follows the player. However, this is actually a bad idea:
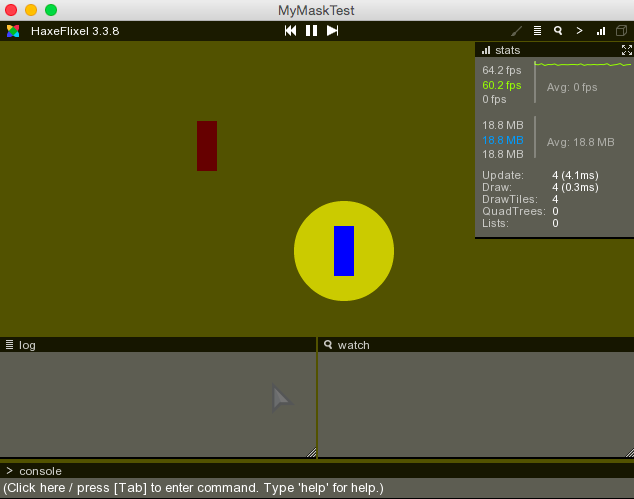
Note the deteriorating FPS (green chart) and increased memory usage (blue chart).
From what I can tell, the newMask FlxSprite ends up caching the unique _curtain ‘s bitmapData. This means, with every update() cycle, a new image is created and cached — eventually, memory will run out and the game will freeze.
To fix this issue, we have to dive deeper into the bitmapData — this is where newbies like me start getting uncomfortable for using image-manipulating API:
|
1 2 3 4 5 6 7 8 9 10 11 12 13 14 15 16 17 |
function UpdateMask():Void { // In each update, create a new mask based on the original // _curtain's uncut rectangle, then cut a circle into it. var newMask = new FlxSprite(); // Instead of cloning pixels (which will result in cached image) // we copy the cached _curtain's bitmapData, then directly "reset" // the pixel data by drawing a fresh rectangle over it. newMask.loadGraphicFromSprite(_curtain); newMask.pixels.fillRect(new Rectangle(0, 0, _mask.width,_mask.height), 0x660000FF); FlxSpriteUtil.drawCircle(newMask, _player.getMidpoint().x, _player.getMidpoint().y, 50, FlxColor.WHITE); // Draw onto the _mask invertedAlphaMaskFlxSprite(_curtain, newMask, _mask); } |
Now if you run the game, the performance no longer deteriorates:
And to wrap things up, we could draw more circles to the single mask, which allows for custom-shaped cut-outs, as demonstrated below:
|
1 2 3 4 5 6 7 8 9 10 11 12 13 14 15 16 17 18 19 |
function UpdateMask():Void { // In each update, create a new mask based on the original // _curtain's uncut rectangle, then cut a circle into it. var newMask = new FlxSprite(); // Instead of cloning pixels (which will result in cached image) // we copy the cached _curtain's bitmapData, then directly "reset" // the pixel data by drawing a fresh rectangle over it. newMask.loadGraphicFromSprite(_curtain); newMask.pixels.fillRect(new Rectangle(0, 0, _mask.width,_mask.height), 0x660000FF); // Draw circles around more than one target FlxSpriteUtil.drawCircle(newMask, _player.getMidpoint().x, _player.getMidpoint().y, 50, FlxColor.WHITE); FlxSpriteUtil.drawCircle(newMask, _dummy.getMidpoint().x, _dummy.getMidpoint().y, 50, FlxColor.WHITE); // Draw onto the _mask invertedAlphaMaskFlxSprite(_curtain, newMask, _mask); } |
Note the above GIF, where the circles do not end up overlapping one another.
I also found and article that says the code doesn’t work for flash target as noted here. However, I just tested it with lime test flash -web and it seems to work fine.
This concludes the tutorial on masking. If I discover a solution for the issues mentioned in the “Masking with two images” section above, I’ll update this post.
Addendum: I found an amazing tutorial that may be relevant, and I highly recommend you check it out:
Sight & Light: how to create 2D visibility/shadow effects for your game

