
Today we’re going to cover the FlxCamera class, and its common uses in HaxeFlixel. Here’s a list we’ll be going through:
- Camera shake
- Camera flash/fade/fill
- Camera follow/lerp/bounds
Project Setup
First, let’s create a template HaxeFlixel project, as usual:
|
1 |
flixel tpl -n "MyCameraTest" |
To demonstrate camera scrolling and follow functions, let’s create a large CSV map data. Copy the data below, save it as map-data.csv, and put it in your /assets/data folder:
|
1 2 3 4 5 6 7 8 9 10 11 12 13 14 15 16 17 18 19 20 21 22 23 24 25 26 27 28 29 30 |
11,11,11,11,11,11,11,11,11,11,11,11,11,11,11,11,11,11,11,11,11,11,11,11,11,11,11,11,11,11,11,11,11,11,11,11,11,11,11,11 11,11,11,12,11,11,11,11,11,11,11,11,11,11,11,11,11,11,12,11,11,11,11,11,11,11,11,11,11,11,11,11,11,11,11,11,11,11,11,11 11,11,11,11,11,11,11,64,11,11,11,11,11,11,11,11,11,11,11,11,11,65,11,11,11,11,11,11,11,11,11,11,11,64,11,11,11,11,11,11 11,11,11,99,11,11,11,11,11,65,11,11,11,11,11,11,64,11,11,11,11,11,11,11,11,11,11,11,11,11,11,64,11,65,11,11,11,11,11,11 11,11,11,11,11,11,11,11,11,11,11,11,11,11,11,11,11,11,11,11,11,11,11,11,11,11,11,11,11,11,11,11,11,11,11,11,11,11,11,11 11,11,64,11,11,65,11,11,11,11,11,11,64,11,11,11,11,11,11,11,11,11,11,11,11,11,11,65,11,11,11,11,11,11,11,11,11,11,11,11 11,11,11,11,11,11,11,11,11,11,11,11,11,11,11,11,11,11,11,11,11,11,11,11,11,11,11,11,11,11,11,11,11,11,11,11,11,11,11,11 11,11,11,11,11,11,11,11,12,11,11,11,11,11,11,11,11,11,11,11,11,11,11,11,11,11,11,11,11,11,11,11,11,11,11,11,11,11,11,11 11,11,11,11,11,11,11,11,11,11,11,11,11,11,11,11,11,11,11,11,11,11,11,11,11,11,11,11,11,11,11,11,11,11,11,11,11,11,11,11 11,11,11,11,11,11,11,11,11,11,11,11,11,11,11,11,11,11,11,11,11,11,11,11,11,11,12,11,11,11,64,11,11,11,11,11,11,11,11,11 11,11,11,11,65,11,11,11,11,11,11,11,11,11,11,11,11,11,11,11,11,11,11,11,11,11,11,11,11,11,11,11,11,11,11,11,12,11,11,11 11,11,11,11,11,11,11,65,11,11,11,11,11,11,11,11,11,11,64,11,11,11,11,11,11,11,11,11,11,11,11,11,11,11,11,11,11,11,11,11 11,11,11,11,11,11,11,11,11,11,11,11,11,11,11,11,11,11,11,11,11,11,11,11,11,11,11,11,11,11,11,11,64,11,11,11,11,11,11,11 11,12,11,11,11,11,11,11,11,11,11,11,11,11,11,11,11,11,11,11,11,11,11,11,11,11,65,11,11,11,65,11,11,11,11,11,11,11,11,11 11,11,11,11,11,11,11,11,11,64,64,11,11,11,11,11,11,11,11,11,64,11,11,11,11,11,11,11,11,11,11,11,11,11,11,11,11,11,11,11 11,11,11,11,11,11,11,11,11,11,11,11,11,11,11,11,11,11,11,11,11,11,11,11,11,11,11,11,11,65,11,11,11,11,11,11,11,11,11,11 11,11,11,11,11,11,11,11,11,11,11,11,11,11,12,11,11,11,11,11,11,11,11,11,11,11,11,11,11,11,11,11,11,11,11,12,11,11,11,11 11,11,11,11,64,11,11,11,11,11,11,11,11,11,11,11,11,11,11,11,11,11,11,12,11,11,11,11,11,11,11,11,11,11,11,11,11,11,11,11 11,11,11,11,11,11,11,11,11,11,11,11,11,11,11,11,11,11,11,11,11,11,11,11,11,11,11,11,11,11,11,11,11,11,11,11,11,11,11,11 11,11,11,11,11,11,65,11,11,11,11,11,11,11,11,11,11,11,11,11,11,11,11,11,11,11,11,11,12,11,11,11,11,11,11,65,11,11,11,11 11,11,11,11,11,11,11,11,11,11,11,11,11,12,11,11,11,11,64,11,11,11,11,11,11,11,11,11,11,11,11,11,11,11,11,11,11,11,11,11 11,11,11,11,11,11,11,11,11,11,11,11,11,11,11,11,11,11,11,11,11,11,11,11,11,11,11,11,11,11,11,11,11,11,11,11,11,11,11,11 11,11,11,11,11,11,11,11,11,11,11,11,11,11,11,11,11,11,11,11,11,11,11,64,11,11,11,11,11,11,11,11,11,11,11,11,11,11,11,11 11,11,11,11,11,11,11,11,11,65,11,11,11,11,11,65,11,11,11,11,11,11,11,11,11,11,11,11,11,11,11,11,11,11,11,11,11,11,11,11 11,11,11,11,11,11,12,11,11,11,11,11,11,11,11,11,11,11,11,11,11,11,11,11,11,11,11,11,11,11,11,12,11,11,11,11,11,11,11,11 11,11,11,11,11,11,11,12,11,11,11,11,11,11,11,11,64,11,11,11,11,11,11,11,11,11,11,11,11,11,65,11,11,11,11,11,11,11,11,11 11,11,11,11,11,11,11,11,11,11,11,11,11,11,11,11,11,11,11,11,11,11,11,12,11,11,64,65,11,11,11,11,11,11,11,11,11,12,11,11 11,65,11,11,11,11,11,11,11,11,11,65,11,11,11,11,11,11,11,11,11,11,11,11,11,11,11,11,11,11,11,11,11,11,11,65,11,11,11,11 11,11,11,11,11,11,11,11,11,11,11,11,11,11,11,11,11,11,11,11,11,11,11,11,11,11,11,11,11,11,11,11,11,11,65,11,11,11,11,11 11,11,11,11,11,11,11,11,11,11,11,11,11,11,11,11,11,11,11,11,11,11,11,11,11,11,11,11,11,11,11,11,11,11,11,11,11,11,11,11 |
For the image tilesheet, let’s go to OpenGameArt.org and use one of the tiny 16 basic spritesheets. Download the basictiles.png (a.k.a. basictiles_2.png) and put it in the project’s /assets/images folder.
Now we can begin coding.
Map & Player Setup
We will not be loading map data using TMX file this time — for simplicity sake, we just load using CSV file. We’ll skip the explanation and jump straight to setting up the map code. Let’s start with the MenuState.hx:
|
1 2 3 4 5 6 7 8 9 10 11 12 13 14 15 16 17 18 19 20 21 22 23 24 25 26 27 28 29 30 31 32 33 34 |
package; import flixel.FlxState; import flixel.FlxG; import flixel.tile.FlxTilemap; import flixel.FlxSprite; import openfl.Assets; class MenuState extends FlxState { var map:FlxTilemap; var player:FlxSprite; override public function create():Void { super.create(); map = new FlxTilemap(); var mapData:String = Assets.getText("assets/data/map-data.csv"); var mapImage:String = "assets/images/basictiles_2.png"; map.loadMap(mapData, mapImage, 16, 16); add(map); } override public function update():Void { super.update(); } override public function destroy():Void { super.destroy(); } } |
If you build with lime test neko now, you should see this:

Note: If the map doesn’t show up, make sure your .csv file does not end with an empty line.
Let’s set the resolution lower so we can zoom in on the map. In the Main.hx, change the resolution width/height from 640×480 to 320×240:
|
1 2 |
var gameWidth:Int = 320; // Width of the game in pixels (might be less / more in actual pixels depending on your zoom). var gameHeight:Int = 240; // Height of the game in pixels (might be less / more in actual pixels depending on your zoom). |
Now if you build again with lime test neko , you should get this:
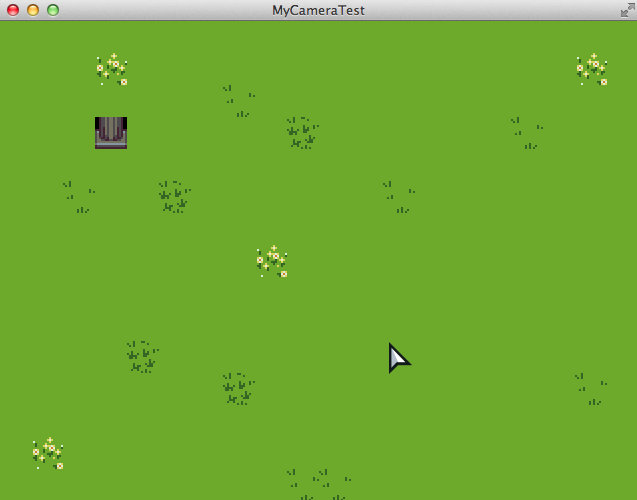
Oh, note that the pillar tile is going to be our player tile. Please excuse the poor choice of graphic; We’re just using one placeholder tilesheet. 🙂
Now, let’s quickly parse the player object so we can move on to the camera stuff:
|
1 2 3 4 5 6 7 8 9 10 11 12 13 14 15 16 17 18 19 20 21 22 23 24 25 26 27 28 29 30 31 32 33 34 35 36 37 38 39 40 41 42 43 44 |
package; import flixel.FlxState; import flixel.FlxG; import flixel.tile.FlxTilemap; import flixel.FlxSprite; import openfl.Assets; import flixel.util.FlxPoint; class MenuState extends FlxState { var map:FlxTilemap; var player:FlxSprite; override public function create():Void { super.create(); map = new FlxTilemap(); var mapData:String = Assets.getText("assets/data/map-data.csv"); var mapImage:String = "assets/images/basictiles_2.png"; map.loadMap(mapData, mapImage, 16, 16); add(map); // Note: tile 99 is going to be our player object var playerCoords:Array<FlxPoint> = map.getTileCoords(99, false); var playerPosition:FlxPoint = playerCoords[0]; player = new FlxSprite(playerPosition.x, playerPosition.y); // Note: when loading graphic for FlxSprite, the default // index is 0, so we reset it back to 99 (the player's tile image) player.loadGraphic(mapImage, false, 16, 16); player.animation.frameIndex = 99; add(player); // Reset the tile under the player to "11", the grass tile var playerTiles:Array<Int> = map.getTileInstances(99); var playerTile:Int = playerTiles[0]; map.setTileByIndex(playerTile, 11, true); } ... } |
There shouldn’t be any difference visually when you build, — we just have a player object which we can control.
Now let’s add some player input in the update function:
|
1 2 3 4 5 6 7 8 9 10 11 12 13 |
override public function update():Void { super.update(); // Reset velocity by default, if not moving player.velocity.set(0,0); // Move player if (FlxG.keys.pressed.UP) player.velocity.y = -100; if (FlxG.keys.pressed.DOWN) player.velocity.y = 100; if (FlxG.keys.pressed.LEFT) player.velocity.x = -100; if (FlxG.keys.pressed.RIGHT) player.velocity.x = 100; } |
And if you build now, you should be able to control the pillar… er, player:

Great! Now let’s move on to the main content of today’s tutorial — using the camera.
The reason why we took quite a few steps to setup the game is so that we have a visual reference, to know the camera functions are working. If you started with a simple empty black screen with a blue box in the middle, it would’ve been difficult to tell if the camera actually shook, or if the camera actually follows the player as you move.
Camera Shake
The simplest way to use the camera shake can be written as follows:
|
1 2 3 4 5 6 7 8 9 10 11 12 13 14 15 16 17 18 |
override public function update():Void { super.update(); // Reset velocity by default, if not moving player.velocity.set(0,0); // Move player if (FlxG.keys.pressed.UP) player.velocity.y = -100; if (FlxG.keys.pressed.DOWN) player.velocity.y = 100; if (FlxG.keys.pressed.LEFT) player.velocity.x = -100; if (FlxG.keys.pressed.RIGHT) player.velocity.x = 100; // Shake camera if (FlxG.keys.pressed.ONE) FlxG.camera.shake(0.01, 0.5); if (FlxG.keys.pressed.TWO) FlxG.camera.shake(0.01, 0.5, null, true, flixel.FlxCamera.SHAKE_VERTICAL_ONLY); if (FlxG.keys.pressed.THREE) FlxG.camera.shake(0.01, 0.5, null, true, flixel.FlxCamera.SHAKE_HORIZONTAL_ONLY); } |
You can refer to the FlxCamera API on how to the function callback and whatnot. If you’re not sure how callbacks are written, try reading the Button events & callback tutorial here.
Notice how when the screen shakes, there’s a visible black area around the screen’s edges:
From a quick search, this page reveals a simple solution. Just add the following lines in your create function to extend the camera size:
|
1 2 3 4 5 6 7 8 9 10 11 12 13 14 15 16 17 18 19 20 21 |
override public function create():Void { super.create(); ... // Note: tile 99 is going to be our player object ... // Note: when loading graphic for FlxSprite, the default // index is 0, so we reset it back to 99 (the player's tile image) ... // Reset the tile under the player to "11", the grass tile ... // Extend the camera a little to cover for shake area var ext = 50; FlxG.camera.setSize(FlxG.width + ext, FlxG.height + ext); FlxG.camera.setPosition( - ext / 2, - ext / 2); } |
Note that the ext value is arbitrary, as long as the camera shake’s intensity doesn’t go beyond the extended range.
And now there won’t be any visible black area when the screen shakes:

Camera Flash/Fade/Fill
Camera flash can be used for situations such as lightning flash, or explosions. Let’s just modify the existing camera shake test buttons like this:
|
1 2 3 4 5 6 7 8 9 10 11 12 13 14 15 16 17 18 19 20 21 22 23 24 25 26 27 28 29 30 31 |
override public function update():Void { super.update(); // Reset velocity by default, if not moving ... // Move player ... // Shake camera var duration = 0.5; if (FlxG.keys.pressed.ONE) { // Shake vertically AND horizontally, and flash white color. FlxG.camera.shake(0.01, duration); FlxG.camera.flash(0xFFFFFFFF, duration); } if (FlxG.keys.pressed.TWO) { // Shake vertically only, and flash red color. FlxG.camera.shake(0.01, duration, null, true, flixel.FlxCamera.SHAKE_VERTICAL_ONLY); FlxG.camera.flash(0xFFFF0000, duration); } if (FlxG.keys.pressed.THREE) { // Shake horizontally only, and flash black color. FlxG.camera.shake(0.01, duration, null, true, flixel.FlxCamera.SHAKE_HORIZONTAL_ONLY); FlxG.camera.flash(0xFF000000, duration); } } |
Now you should get this when you test:

The camera’s fade and fill functions are similar to flash .
fade will gradually fill the screen with a color — the opposite of flash. fill instantly fills the screen with a certain colour. These two functions can be used hand-in-hand for situations like fading in or out between screens. You can check out the FlxCamera API for more info.
Camera Follow/Lerp/Bounds
To get the camera to follow something (in this case, the player), you can just write it like this:
|
1 2 3 4 5 6 7 8 9 10 11 12 13 14 15 16 17 18 19 20 21 22 |
override public function create():Void { super.create(); ... // Note: tile 99 is going to be our player object ... // Note: when loading graphic for FlxSprite, the default // index is 0, so we reset it back to 99 (the player's tile image) ... // Reset the tile under the player to "11", the grass tile ... // Extend the camera a little to cover for shake area ... // Follow the pillar... er, player. FlxG.camera.follow(player); } |
And here’s the result when you move around:

At first glance, there are three problems:
- The camera scroll is too rigid (no deadzone).
- The camera movement is not smooth (no lerping).
- The camera can move out of bounds (shows the black area).
Let’s go fix each of the problems above.
1) To fix the rigid scroll issue, you need to add “deadzones” in the camera (an area within the screen that won’t scroll the camera). HaxeFlixel has a few presets which can be used in the follow function, as indicated in the API page. Here’s an example usage, by modifying the existing code:
|
1 2 |
// Follow the pillar... er, player. FlxG.camera.follow(player, flixel.FlxCamera.STYLE_TOPDOWN); |
Note that we added the preset STYLE_TOPDOWN and now it’ll automatically follow the player, with a little deadzone, as demonstrated below:

2) To add smooth camera scrolling (lerping the movement), you can just add additional values to the follow function, like this (refer to the API):
|
1 2 |
// Follow the pillar... er, player. FlxG.camera.follow(player, flixel.FlxCamera.STYLE_TOPDOWN, null, 10); |
And now the camera will lag a little when the player moves:

3) To prevent the camera from moving out of bounds, you just need to set the bounds of the map, like this:
|
1 2 3 4 5 6 7 8 9 10 11 12 13 14 15 16 17 18 19 20 21 22 23 24 25 |
override public function create():Void { super.create(); ... // Note: tile 99 is going to be our player object ... // Note: when loading graphic for FlxSprite, the default // index is 0, so we reset it back to 99 (the player's tile image) ... // Reset the tile under the player to "11", the grass tile ... // Extend the camera a little to cover for shake area ... // Follow the pillar... er, player. ... // Set the camera bounds FlxG.camera.setBounds(0, 0, map.width, map.height); } |
And this will give you the result:

There’s a lot of other things you can experiment with in FlxCamera, so go ahead and try them all out! The information above should be enough to give you a rough idea of what’s possible with the FlxCamera — they’re very handy in prototyping games.
This concludes today’s tutorial on HaxeFlixel’s camera. In the next post, we’ll try something more advanced with the camera — split screens and parallax scrolling.